

From Nai Harn in the South of Phuket we sail upwind to Langkawi, where we do a revision of both clutches of our Yanmar SD 60 Saildrives and install new Lithium Ion Batteries on board.
Through the bush to the Black Rock View Point overlooking Nai Harn
With all family visit gone we first take a day’s brake and start for a hike up to the Black rock viewpoint overlooking Nai Harn. Even though the ladies at the kiosk tell us that there isn’t any path from that side of the hill, we start hiking up and up until we end in a thick bush full with thorns.
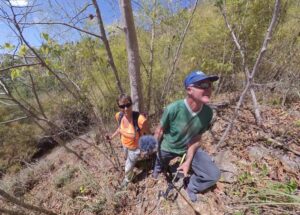
Obviously this really isn’t a hiking path and of course we didn’t bring our machete. We are about to give up when at the third attempt we manage to cross the thorns and find a little path on the other side.
The view point is really worth the hassle, although I recommend to take either the path via the cape or the path coming from the Nui beach access road.
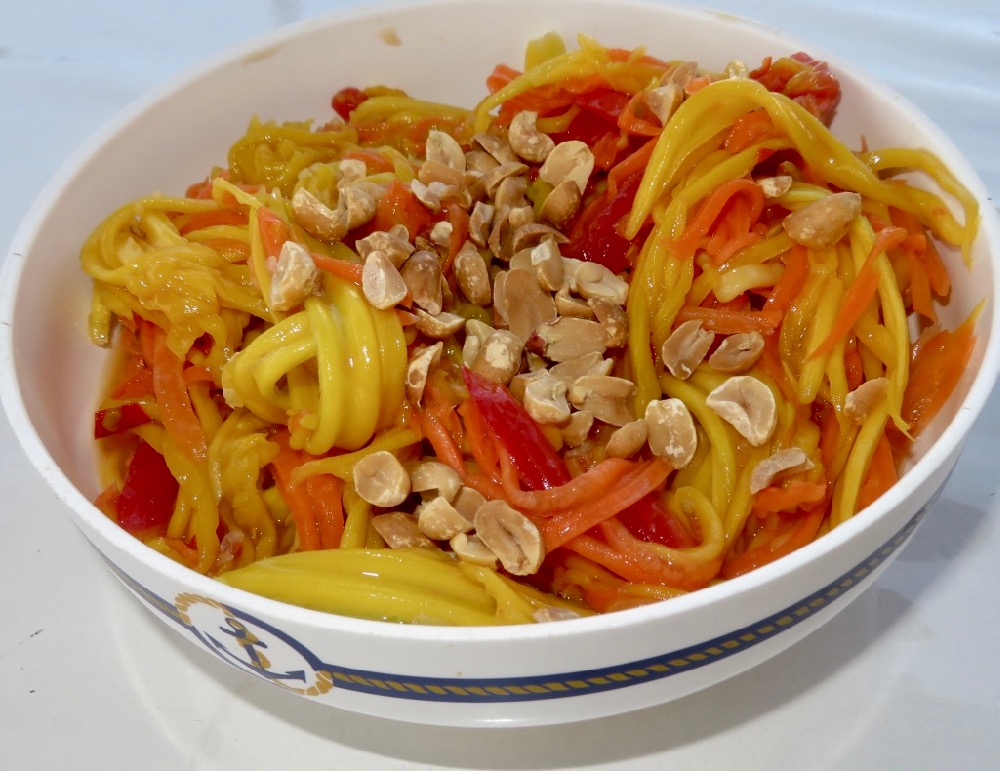
Back down in Nai Harn we enjoy a delicious late BBQ and papaya salad (Som Tam) lunch at our favorite roadside “restaurant”.

Then it is time to check out for Langwawi – we run out of beer. Just kidding, actually the reason is that we have some really serious maintenance to do on our Yanmar SD 60 saildrives, where we have to exchange some parts of the clutches.
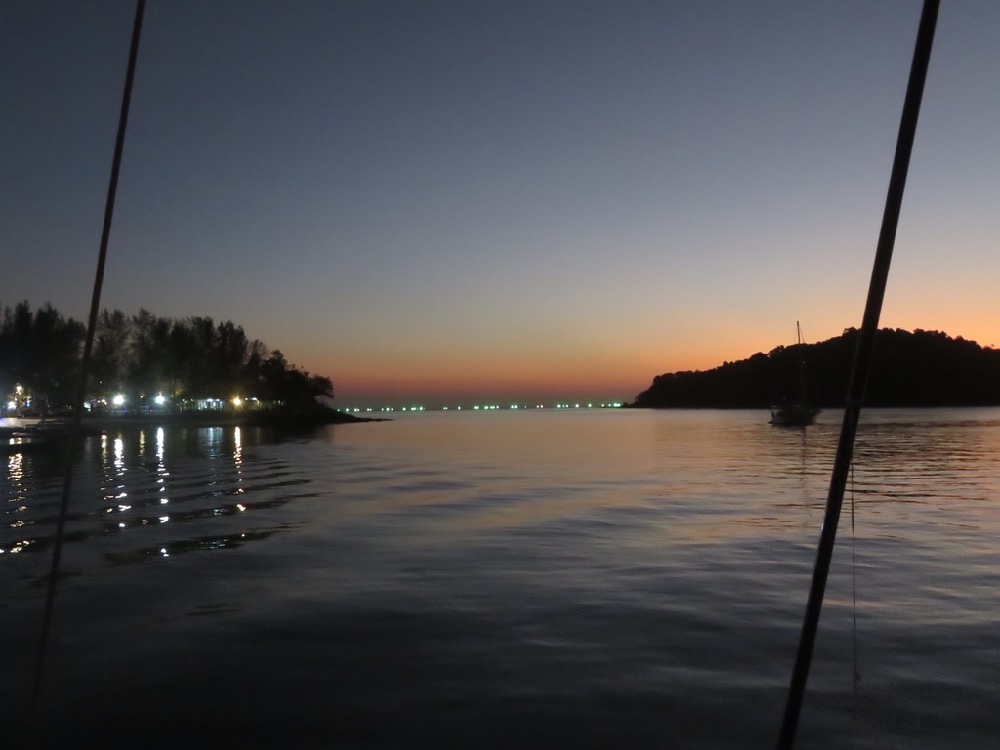
Early morning sailing from Nai Harn to Telaga, Langkawi
Since the wind in general dies around noon we start each day at 6.30 am with the first sunlight and it works out well. Via Ko Phi Phi, Ko Lanta South and Ko Phetra we manage to almost sail every bit of it with the wind from the northeast in the morning, then changing to the southeast and getting weak until noon.

In Ko Mook we take a days break as there is no wind anyway. From Haad Farang we walk over to the village, hike up to the viewpoint, down to Sabai beach and around the north end of the island, a total of 14 km for sure.


This wasn’t our lucky day, though.
In the morning the head of the genoa has ripped off and we find all the seams of the upper part completely dissolved.
Just before arriving in Telaga I also broke our two months old alternator because I was running my crazy blender in order to make a curry paste….
Oh my god.
As if the list of repairs wasn’t long enough anyway!!
On the last day we stop in the Southern bay of Ko Tarutao, but gusts of 30+ knots get us to go anchor up and sail the last 14 miles to Telaga harbour in Langkawi.


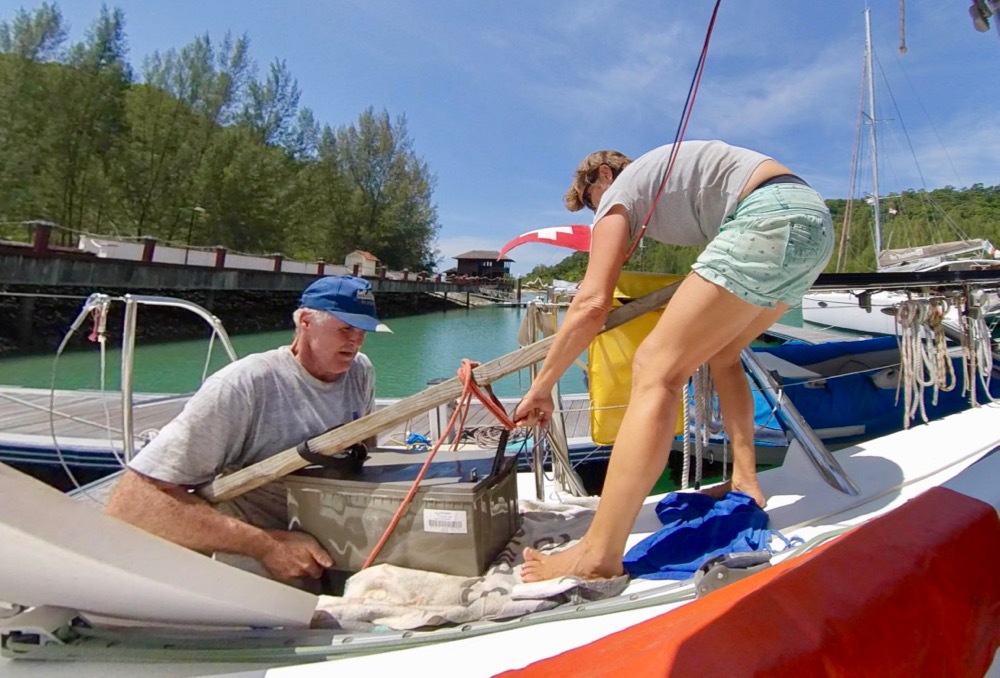
Exchange of the clutch parts on our Yanmar SD 60 Saildrives
We wait another week for our engine parts, then it is time for the serious work. We move to Rebak marina to take our saildrives apart. Due to a design error from Yanmar (or whoever did the design of the clutch) the clutch parts of our only 3 years old SD 60 Saildrives need to be exchanged with parts that cost a few thousand dollars. Yanmar used to exchange these parts on warranty, but does so only until 2 years after purchasing. Since we didn’t engine enough we only found out about the problem after 3 years. Excellent. So now it is our fault that Yanmar did that design error and that we prefer to sail instead of running the engines!!!
Oh yes, what is the problem anyway? The clutch sometimes doesn’t engage, so we don’t get the gears in. This isn’t such a huge problem out in an anchorage with a lot of space, but when we went into the Royal Langkawi Yacht Club the other day we just bumped right into a pole because of it…
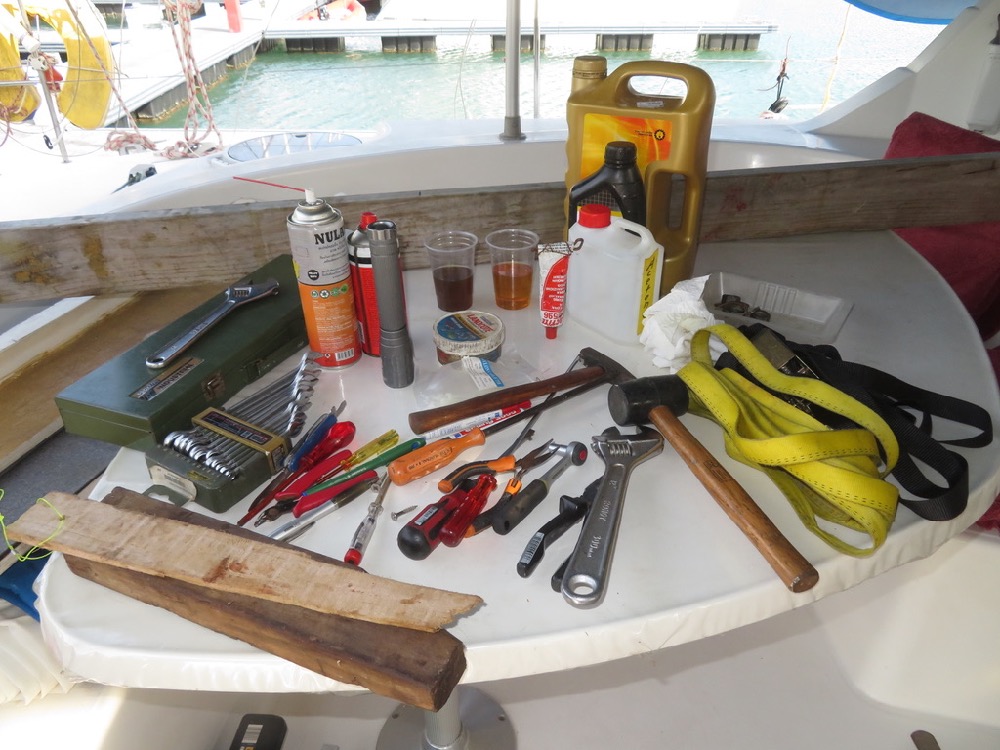
Ok, now Reto wants to do the exchange by himself. We also did the exchange of the whole saildrives back in Grenada, so the clutches should be fine, too. We still remember how to lift up the engine and even still have the piece of wood that fits exactly underneath the engine block.
The day before Reto’s birthday we are ready to start. We take out the first baby – that’s how we lovingly call the clutch unit because we have to look after it well and for sure not drop it!!
It all goes well, except for the fact that the last two screws of the lid of the housing are hiding underneath the flange of the engine, so the engine really needs to be lifted in order to access these screws!!! Incredibly smart engineering!!!
But then what? We need a mechanical press and had hoped to find one in the marina. But there isn’t. After a day of engine room sauna we cool down in the pool – that’s really awesome here in the Rebak marina!! There we meet Duncan and Ruth bathing with their 3 little children.
After listening to our problem Duncan suggests “I have a bottle jack, it might be a solution, if you want to borrow it” We first have to understand what a bottle jack is, then Reto starts to think. The next morning we go and borrow it in exchange for half of Reto’s birthday cake. It is a bit oily and corroded but it seems to work. We collect a few pieces of wood in the boatyard, find the pack with the engine parts, it really feels like a birthday ;-).
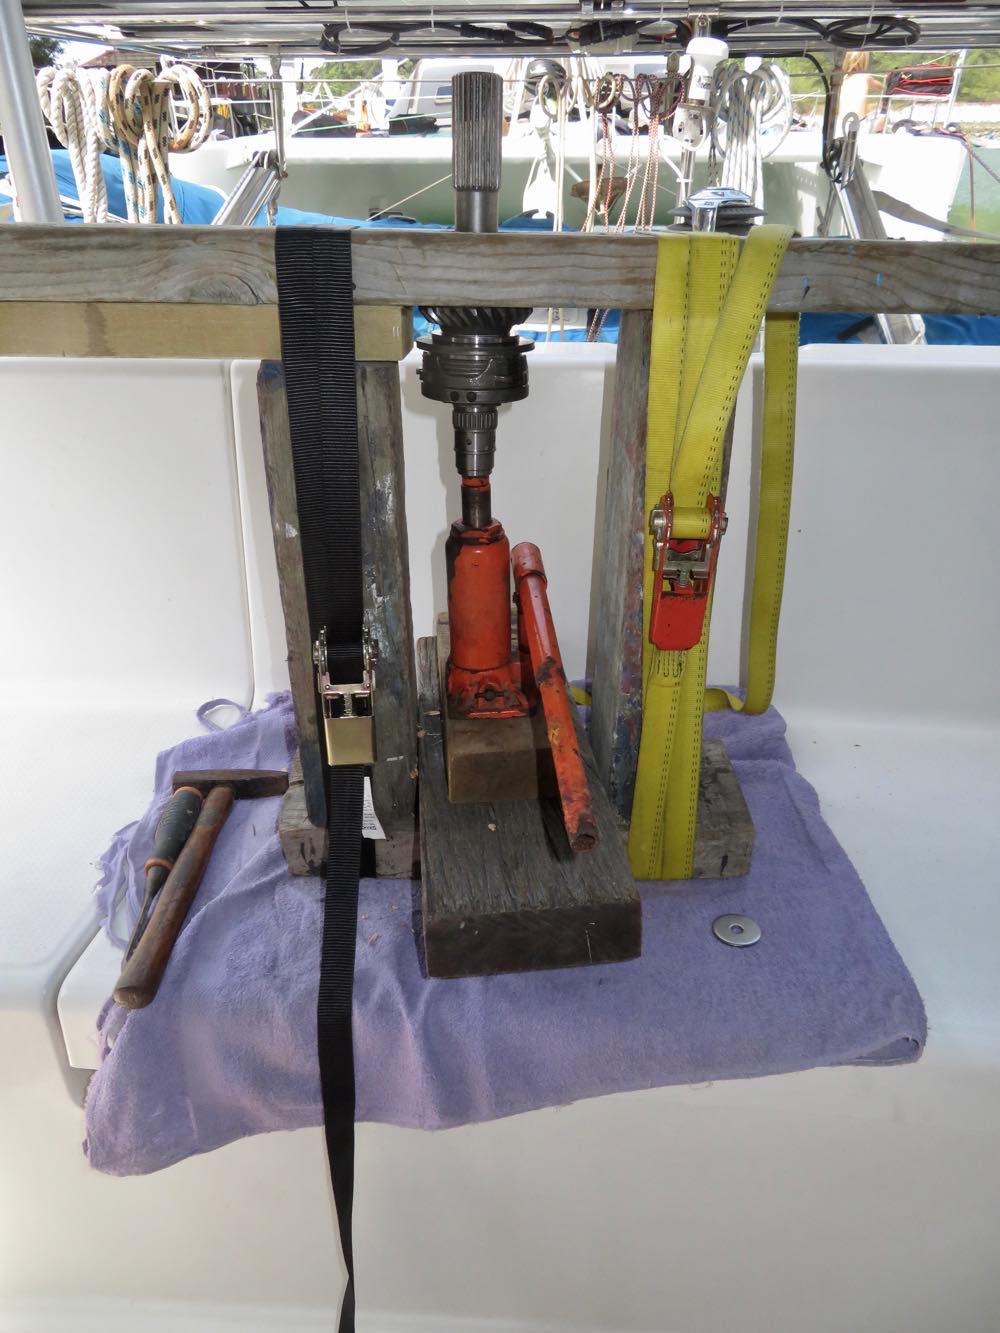
And indeed, it works. At the second trial the bottle jack presses out the shaft and “pling, pling, pling” the pieces fall down.
Now everything only has to be cleaned, then carefully mounted together, fresh oil filled in, the lines on the pontoon tightened (so we can use the drives). We first check without engine, all good. Then I start the engine and put the gear in – “Clack”. This was loud, we both feel puzzled. Before we hardly could hear it. Reto checks again the mounting of the clutch elements and indeed finds an error. So oil out, engine up, lid off, the same procedure… In the end we ae sure that it is correctly mounted, but the noise is the same: “Clack”. Via telephone we check with two Yanmar specialists, they both feel that this is probably normal, since no noise is normally not a good sign.
Ok, we do the port side as well, now we are already skilled, it goes all quite well. Almost all. Just before the last screw engages Reto hits the large washer with his finger. We both see it falling PLONG PLONG off the cockpit, it hits the dinghy and makes SPLASH into the water.
“Oh nooooo! This cannot be true” Reto is crying. I get the mask, flippers, dive jacket, regulator, bottle – I know we shouldn’t loose any time now. We agree on the point where we have last seen the precious piece of metal. With a weight on a line I mark the point and Reto descends carefully not to whirl up too much dust.
At the set marker Reto looks for the piece with his hands moving through the half meter deep super soft mud ( a bit later Mark explains to him that the waste water pipe from the hotel ends not too far away and that the soft mud is eventually po)…and he really finds it there. Wow, what a relief! After a good shower we go for a beer and call it a day!!

After a total of 5 days of work (well, one wouldn’t really have been necessary) both clutches are revised and in addition all four engine mounts. The second clutch makes the same “CLACK” as the first, so we are confident that this is normal.

Finally Lithium Batteries on board
Next we start another big important project: our Victron AGM battery bank is slowly loosing its function after a bit more than 4 years, so now it is time to change to Lithium. Reto has been enthousiastic about it for years already, but when we left Europe 4 years ago the Lithium was still 4 times as expensive as today.
But now we just had Chinese New Year and thanks to Corona Virus this year the period of no deliveries from China is consideralby extended, so no delivery possible… Reto writes to a dozen suppliers and only gets one serious answer – from Mark from Seaspray Marne Services located in the Rebak Marina where we are!! What a coincidence that Mark has exactely the 12 pieces of 180 Ah CALB Lithium cells that we are looking for! In addition everything else that we need, Batterie Management System, Victron Contactors and Cables. Only the copper connection plates are missing, these the supplier had forgotten to deliver.
Reto draws a new circuit diagram, plans the positioning and connection of the batteries, then we know what we need. We do a run into the city (a passable car is 50 Ringgit (USD 12.50) per day, buy a 3 mm copper band at the electronic shop and get it cut at the stainless steel shop. Some nuts and bolts from the hardware store and we are et for the project. Of course I also fill up the car with food and beer as well.
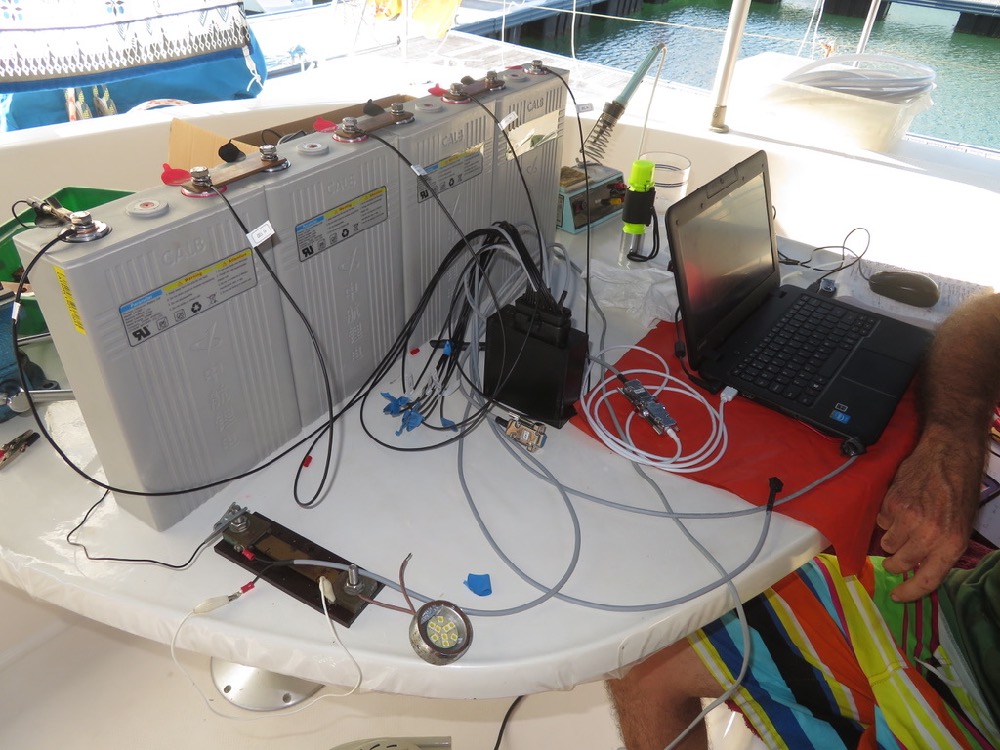
The next days we drill holes and file smooth the ends of the plates and Reto makes a test run of the BMS (“Battery Management System”) on the cockpit table. Of course it takes a while to get everything running and it was a great idea to test before starting the installation itself.
Then the day has come. We first take out the 60 kg per piece AGM batteries. This is incredibly heavy and only with our engine proof tension belts and wooden plank we manage to move these giants out from their box.
Still Reto hurts his shoulder, so as a consequence he happily tells the security guys to get them for us off the boat (they are happy too because they get some money from the disposal).
The 5 kg CALB batteries on the other hand are a real pleasure to handle.
Here a short comparision:
old: Victron AGM 660 Ah (7.92 kWh) of which
- maximum of 50% are utilizable means 330 Ah (3.96 kWh)
- at 800 cycles in our case a utilization of 4 years
- Weight 180 kg!
- Investment 4.5 years ago: EUR 1800.-
new: Calb Lithium 540 Ah (6.91 kWh)
- maximum of 80 % are utilizable means 432 Ah (5.53 kWh)
- at 2000 cycles in our case a utilization of well more than 10 years
- Weight 60 kg!
- Investment Feb 2020: EUR 3000.- (including BMS, Contactors, Update Regulators, additional cables)
The following “wiring” with the copper plates is the most dangerous part of the mounting. Now it is absolutely critical not to produce a shortcut, otherwise SHE SAN and part of the Rebak Marina will be blown away. Reto puts isolation tape around the wrenches and works fully concentrated.

A few hours later the new batteries are mounted and an exhausted Reto drags himself to the pool. Cooling down after a day in the engine room is invaluable, even though I sweat only half as much handing down the materials and tools.
The next few days he has to adapt the regulators to have the right values for shutting off, so that the batteries are not overcharged.
There are two main differences between Lithium and Lead Acid batteries:
- The Lithium “eat everything that is delivered” (load all the Ah produced) until a certain maximum value whereas the Lead Acid cut down the input current considerably already after a short time
- A their maximum voltage the Lithium do not want to be “floated” (continuously charged with little currents) like this is the case with the Lead Acid batteries.
We are happy about the whole setup and our new “babies”. That is how we now lovingly call our Lithium cells because they also have to be looked after well in order to be healthy ;-).


Final countdown
Finally we meet again with our friends Annie and Hugh from SV Vega. We haven’t met since Vanua Balavu in Fidji, almost two years ago!!

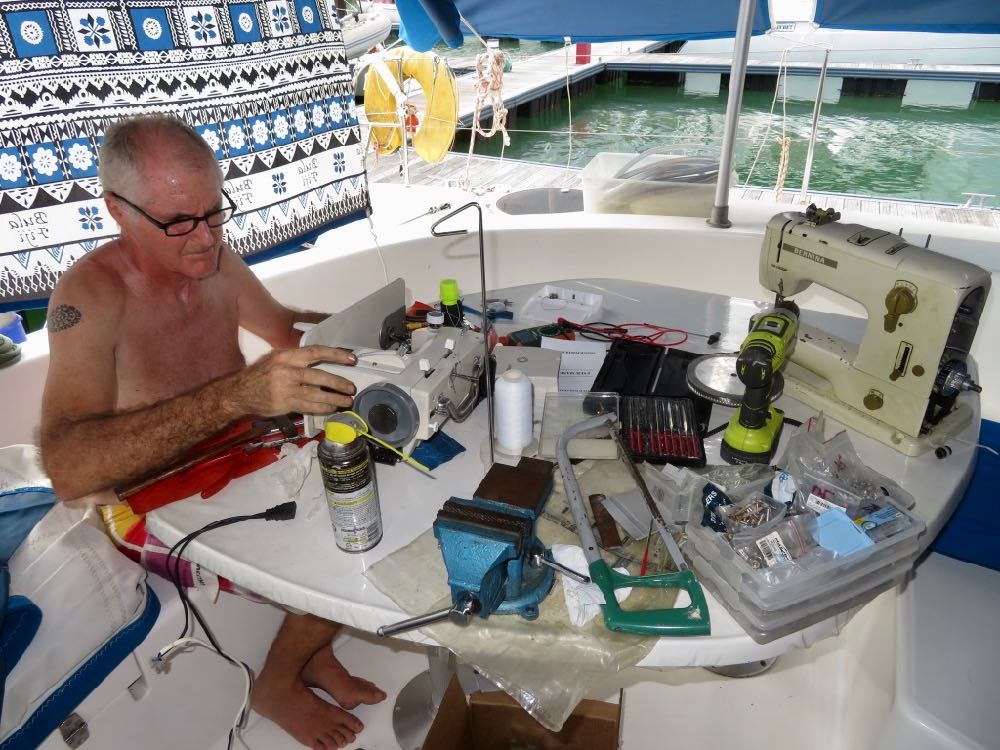
”Just finish sewing the sail with the new sewing machine” means fixing the brand new Barracuda machine for a minimum of two days, then the water maker still needs some service, and so on…


Then it is also about time that we finish our works in the marina. My sister Gaby and her husband Markus join us and it is time to do some holidays ;-)!
Hi, My 2016 L48 one of our sd60 will not engage into gear without quite a bit of effort and sometimes extra rpm. I read through your info and am not quite sure what you ended up doing. Is it a total rebuild of the clutch? 1200 hours on the unit
Thanks
Steve